Empty the dirt container and clean the filters
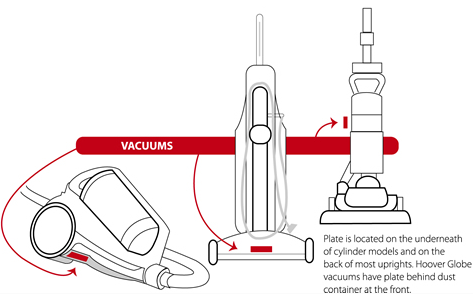
We recommend in order to get the best suction power and keep your cleaner working efficiently that you should check that the dust box is emptied regularly and the 2 filters attached to it are kept clean. This will also prevent the product overheating and cutting out. To lift the dust box out squeeze the release button at the top of the handle and lift it up. At the back of the box you will find the blue filter release – it is best to have the dust box positioned over your waste bin when you release the filter
We recommend in order to get the best suction power and keep your cleaner working efficiently that you should check that the dust box is emptied regularly and the 2 filters attached to it are kept clean. This will also prevent the product overheating and cutting out. To lift the dust box out squeeze the release button at the top of the handle and lift it up. At the back of the box you will find the blue filter release – it is best to have the dust box positioned over your waste bin when you release the filter
remove the box and blue filter

empty the box over your dustbin press the red release button
Dust the filter with a brush or wash it under a warm tap. Now pull on the red bin release to empty the dust box contents into your waste bin. You can wash the dust container out in warm water.
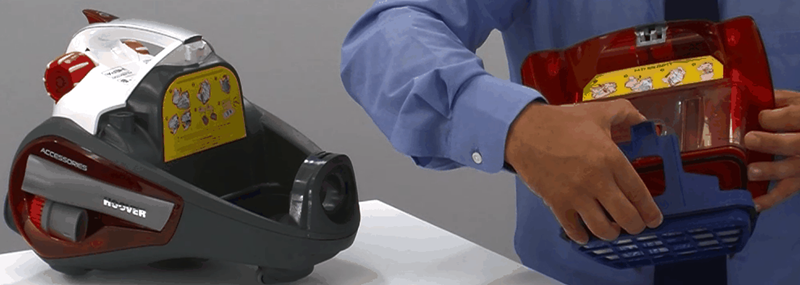
The exhaust filter is located on the left side of the body when looking from the back.
Pull the release catch and lift off the cover. Take the filter out and dust it clean or wash in some warm water. Please do not use any detergent to wash the filters and ensure they have dried thoroughly before fitting them back, this can take up to 24 hours. Filters will require regular replacement. Should you require replacement filters you can purchase them via the spares section of this website.
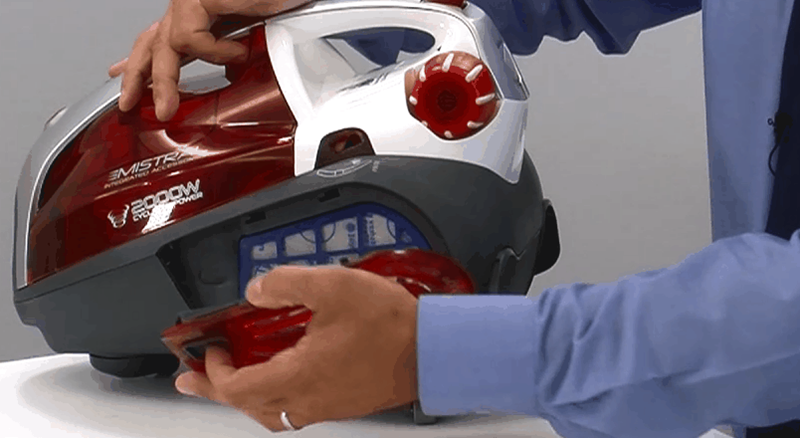
pull the release and remove the cover
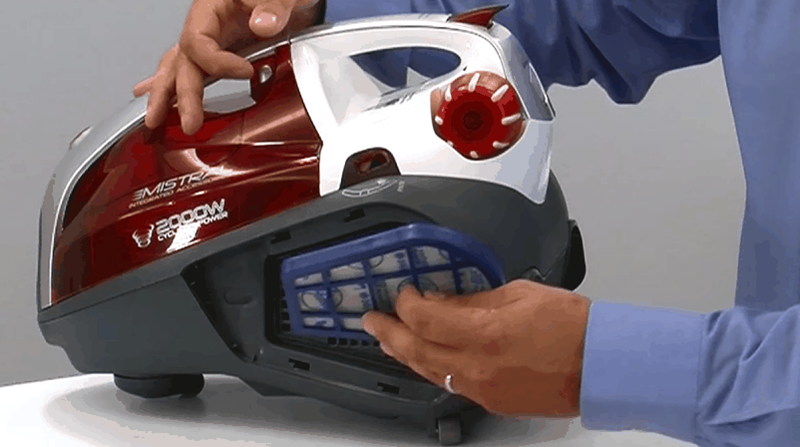
remove the blue exhaust filter for cleaning
This solution applies to the following models:
Vacuum Cleaners
- TF5192 - 39000451
- TFC3185 - 39000413
- TFC6203 - 39000402
- TFC6207 - 39000414
- TFS5206 - 39000474
- TFS5209 - 39000511
- TFS7100 - 39000529
- TFS7185 - 39000651
- TFS7195 - 39000475
- TFS7197 - 39000524
- TFS7198 - 39000523
- TFS7202 - 39000540
- TFS7208 - 39000596
- TFS7209 - 39000453
- TFS7210 - 39000541
- TFS7220 - 39000542
- TFV2015 - 39000722
- TMI2015 - 39000828
- TMI2019 - 39000939
Empty the dust box, it may be full.
The dirt collected by your robot goes into a collection box. Take this out and empty it.
The dirt collected by your robot goes into a collection box. Take this out and empty it.
This solution applies to the following models:
Vacuum Cleaners
- RCB009 - 39000911
Empty the dust container
Press the release button firmly and remove the dust box, empty it out into your waste bin and refit it firmly until you hear it 'click' into place.
Press the release button firmly and remove the dust box, empty it out into your waste bin and refit it firmly until you hear it 'click' into place.
This solution applies to the following models:
Vacuum Cleaners
- RBC090001 - 39001242
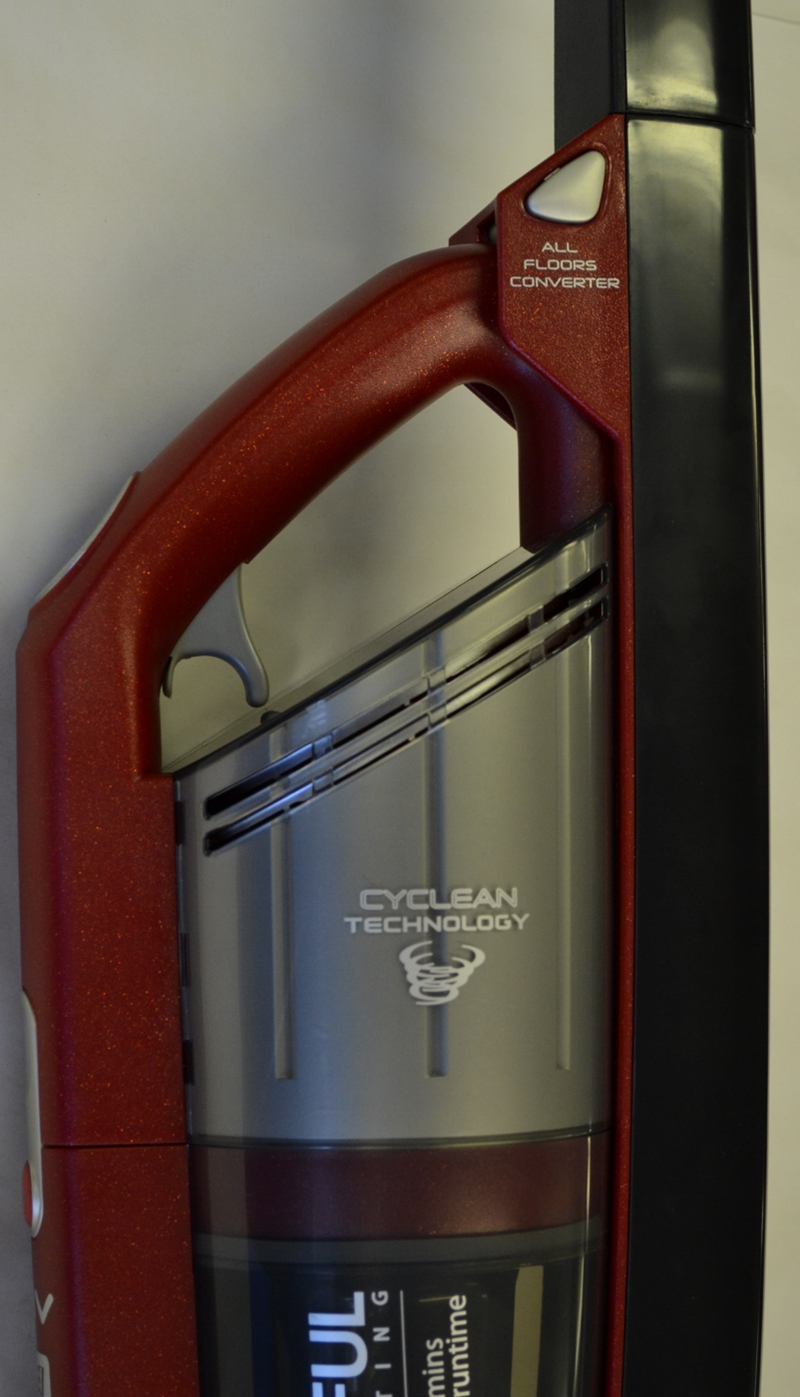
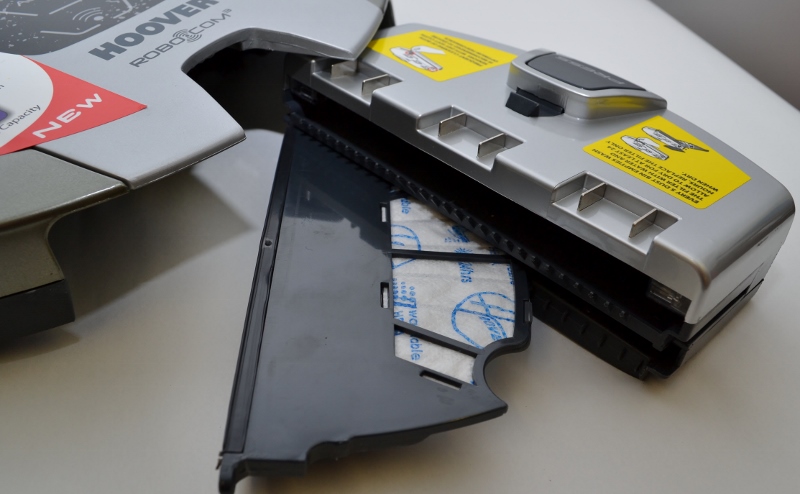
Empty the dust container and clean the filters
To empty the dust box it is first necessary to remove the dust box / hand held attachment from the cleaner. Press the 'all floors converter' button and lift off ( found at the top of the dust box handle). Hold the container over your dust bin and pull the trigger on the top handle to open the dust release flap.
To empty the dust box it is first necessary to remove the dust box / hand held attachment from the cleaner. Press the 'all floors converter' button and lift off ( found at the top of the dust box handle). Hold the container over your dust bin and pull the trigger on the top handle to open the dust release flap.
Now unclip the top of the dust box to reveal the filters. Grasp the silver handle and pull the filter assembly out. This filter now breaks out in 2 parts:
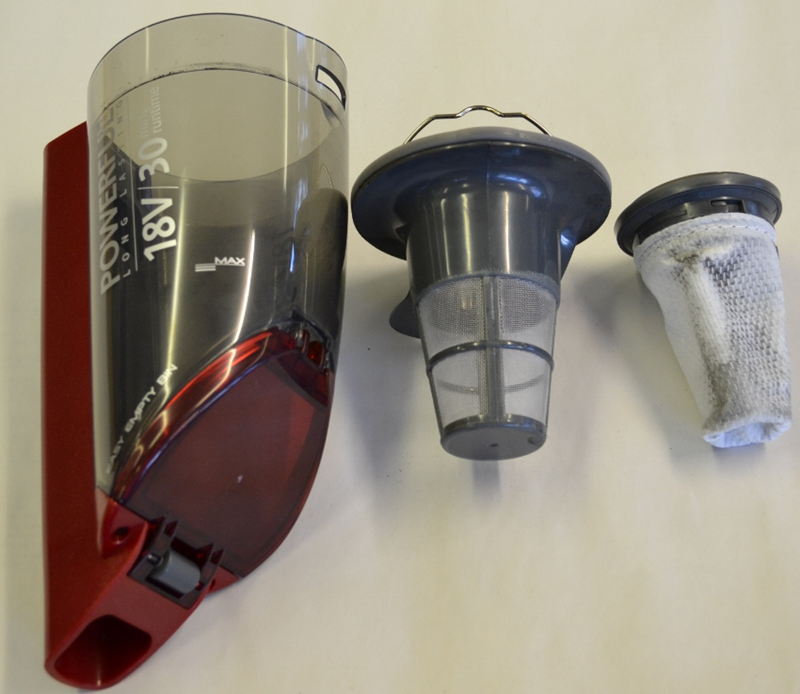
From left to right, Dust box, mesh screen and hepa filter.
Wash the dust box and filters in warm water and allow to dry thoroughly, this may take up to 24 hours before re assembly.
Fit the supplied optional wiper blades
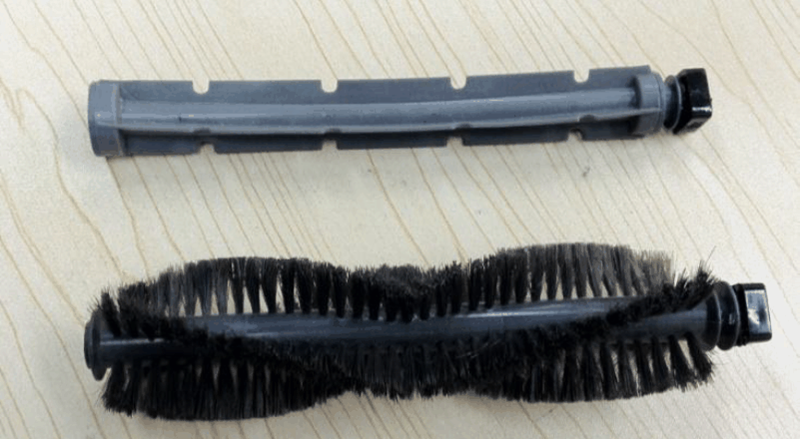
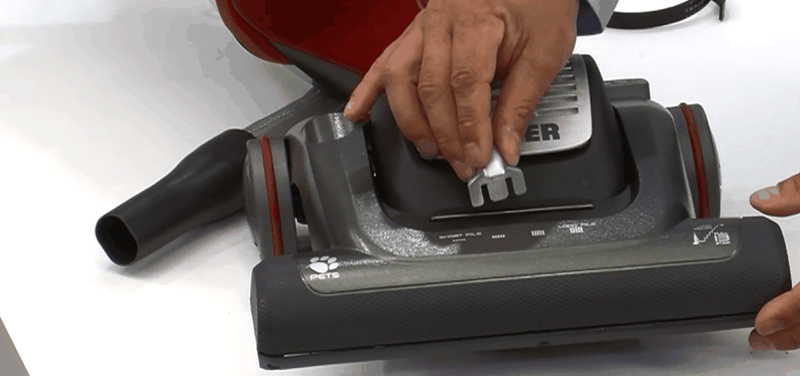
One of the more unique features of the H-Free product is the 2 wiper blades which can be fitted for best performance. The blades can be found in the packaging that contains the instruction book. We recommend to fit the blades into the soleplate of the nozzle. Start by removing the agitator and soft strip by pulling it up and out. Both blades can then be slid into the 2 remaining slots.
Once both are fitted, refit the brush roll.
Should you find the cleaner is harder to push on some floor coverings, simply remove the blades.
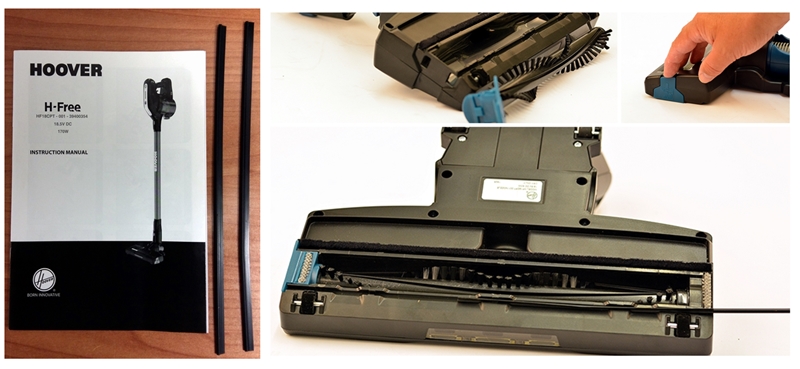
pictured above on the left 2 wiper blades supplied and fitting to the floor nozzle
This solution applies to the following models:
Vacuum Cleaners
- HF122RPT 001 - 39400918
- HF18CPT 001 - 39400354
- HF18RH 001 - 39400353
- HF222RH 001 - 39400912
- HF222UXL 001 - 39400919
- HF222XLRG 001 - 39400389
- HF522BH 001 - 39400915
- HF522PTE 001 - 39400921
- HF522STH 001 - 39400982
- HF522STP 001 - 39400983
- HF522UPT 001 - 39400914
- HF722G 001 - 39400368
- HF722PG 001 - 39400369
- HF822OF 001 - 39400397
- HFC216R 001 - 39400360
- HFC324U 001 - 39400361
Replace the paper bag inside the tank
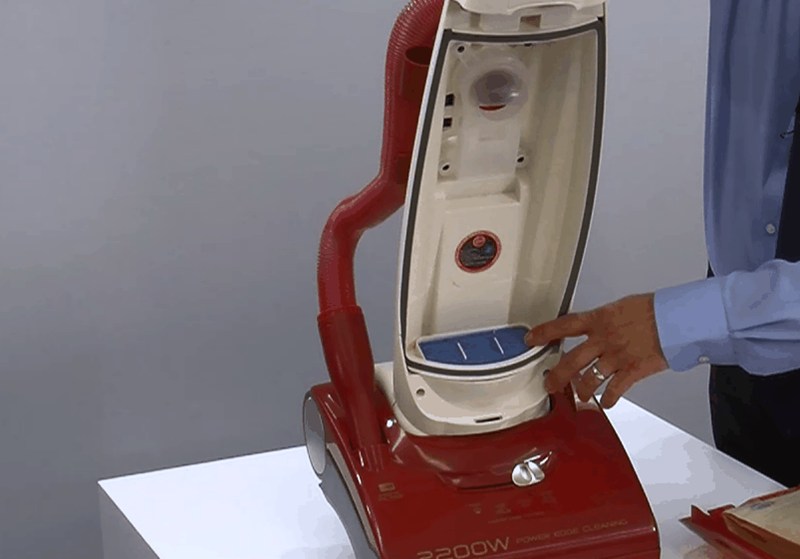
The bag may be full. We recommend that you fit a new paper bag once it is 2/3 full. Unclip and remove the lid, then lift out the bag. Should you require replacement filters you can purchase them via the spares section of this website.
The bag may be full. We recommend that you fit a new paper bag once it is 2/3 full. Unclip and remove the lid, then lift out the bag. Should you require replacement filters you can purchase them via the spares section of this website.
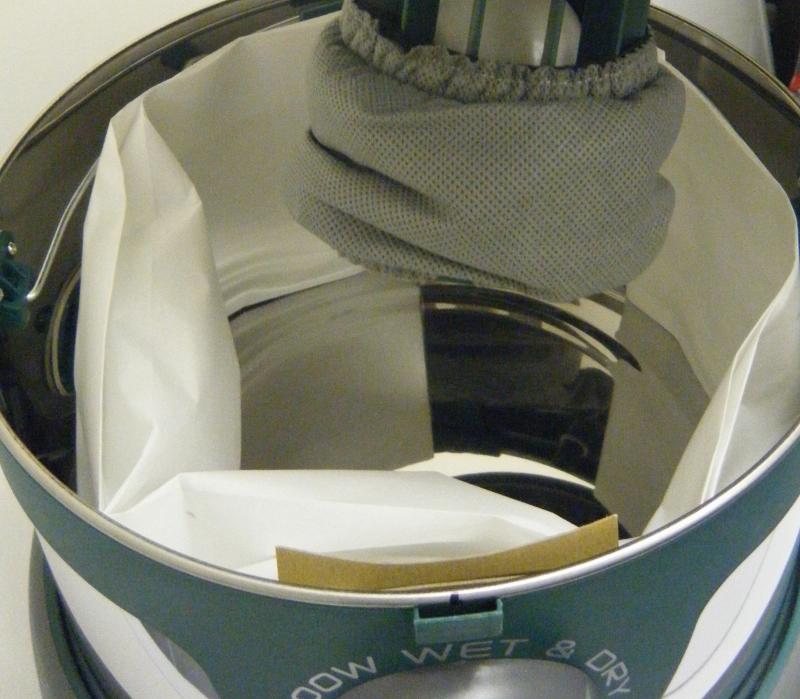
Paper bag inside the tank, note the filter around the motor suction
Check that the belt is not broken or worn
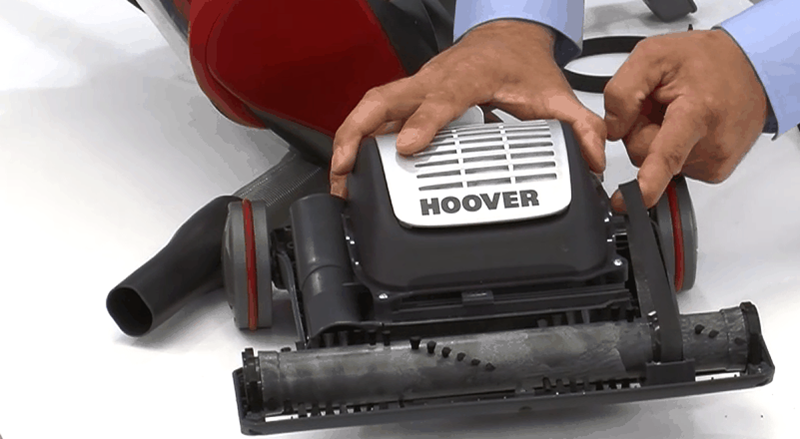
If your cleaner is leaving fluff or hair on the carpet and not sweeping up the dirt it may be due to wear on the drive belt that makes the brush roll underneath spin round. Switch the product on and have a look at the brushes by carefully tipping the cleaner back. If the brushes are not spinning this may be due to the belt breaking. Belts will stretch and wear over time so it is a good idea to replace the belt regularly to keep the cleaner working efficiently. The brushes will also wear away and just like the belts will need to be renewed. You can purchase replacements from our spares site and follow these steps to get to the belt and brush roll.
If your cleaner is leaving fluff or hair on the carpet and not sweeping up the dirt it may be due to wear on the drive belt that makes the brush roll underneath spin round. Switch the product on and have a look at the brushes by carefully tipping the cleaner back. If the brushes are not spinning this may be due to the belt breaking. Belts will stretch and wear over time so it is a good idea to replace the belt regularly to keep the cleaner working efficiently. The brushes will also wear away and just like the belts will need to be renewed. You can purchase replacements from our spares site and follow these steps to get to the belt and brush roll.
Before doing any work please unplug the appliance.
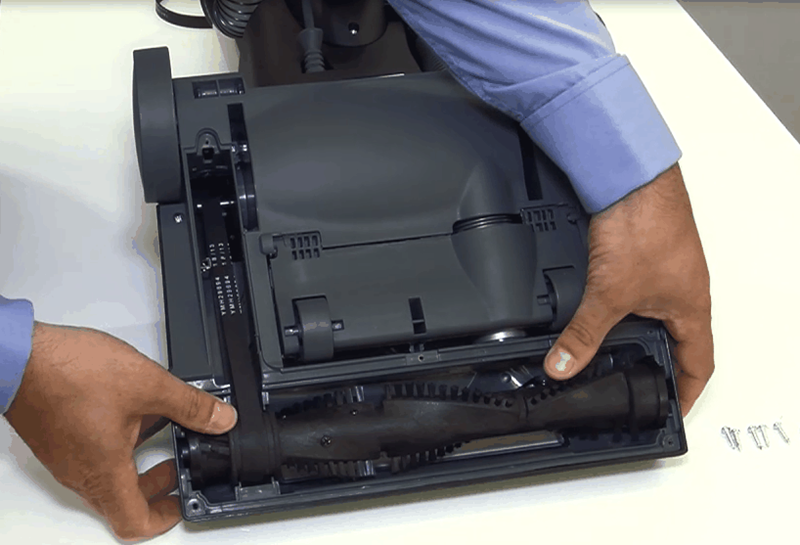
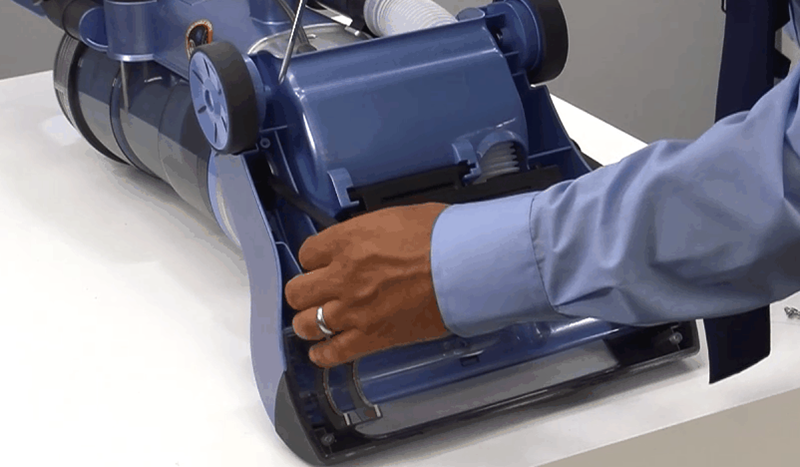
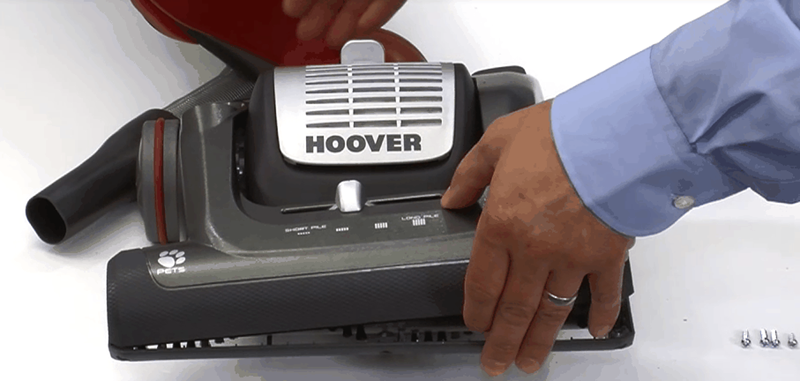
The first step is to remove the brush cover on the bottom of your cleaner.
using a standard Phillips screwdriver take out 6 screws

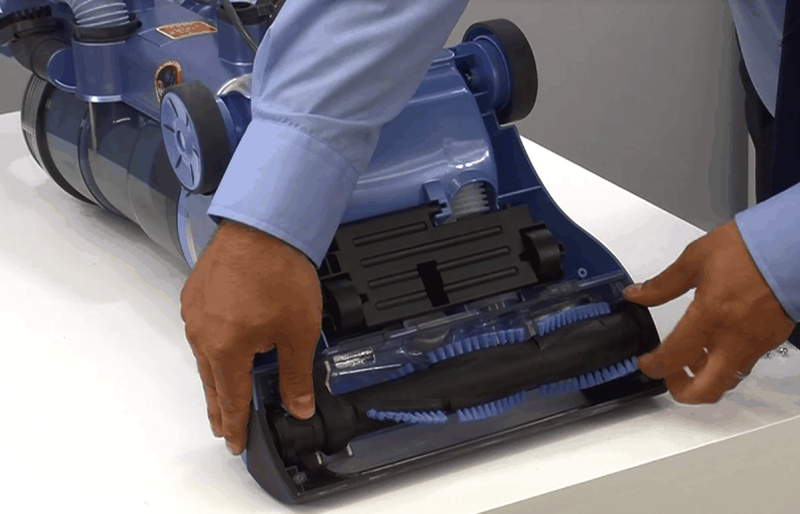
and lift off the cover to reveal the brush roll and belt
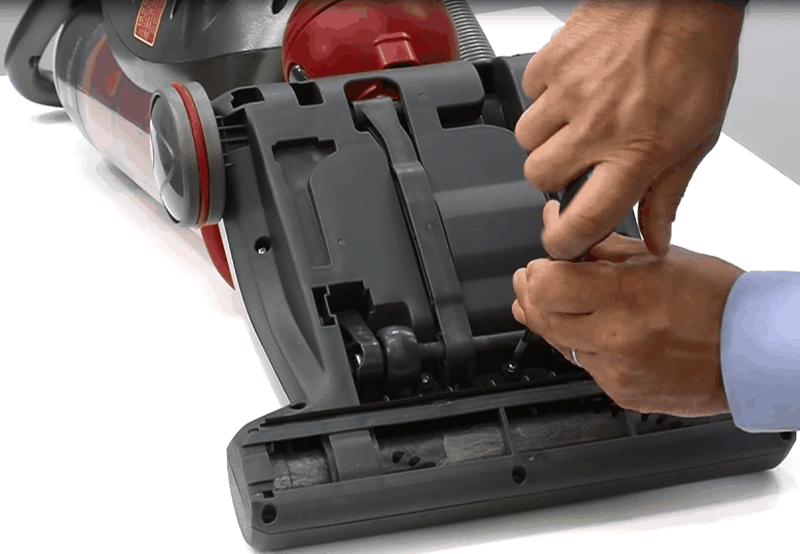
Remove the worn belt and or the brushes and fit the new belt by first looping it over the motor spindle. This may appear brown or even rusty which is perfectly normal.
loop the other end of the belt over the brush roll, stretch the belt by pulling on the brush roll and push down into position. Before refitting give the brush a couple of turns by hand just to check that the new belt is not jammed.
push the brush down into place and turn by hand to make sure it is free to turn
Finally re fit the cover and the screws
This solution applies to the following models:
Vacuum Cleaners
- DI2200 - 39100314
- HL2102 - 39100265
- HL2107 - 39100298
- HL2208 - 39100315
- HP22+SP48D - 39100302
- HP2300 - 39100300
- HP2305 - 39100343
- HS22+SP48D - 39100309
- HU4177T - 39100155
- HU4185 - 39100196
- HU4187T - 39100164
- HU4197 - 39100180
- HU4200 - 39100226
- HU4201 - 39100223
- HU4202 - 39100198
- HU4203 - 39100215
- HU4204 - 39100225
- HU4205 - 39100188
- HU4206 - 39100224
- HU4207 - 39100177
- HU4207/1 - 39100212
- HU4208 - 39100211
- HU4217/1 - 39100303
- HU4220 - 39100319
- HU71HU02 - 39100397
- HU71HU04001 - 39100431
- HU71HU05001 - 39100453
- SM1800 - 39100232
- SM1901 - 39100239
- SP2101 - 39100323
- SP2102 - 39100322
- TH31SM01 - 39100492
- TH31SM02 - 39100493
- TH71SM01 - 39100399
- TH71SM01001 - 39100434
- TH71SM02 - 39100400
- TH71SM02001 - 39100435
- TH71SM03 - 39100401
- TH71SM03001 - 39100436
- TH71SP04 - 39100446
- TSM1805 - 39000952
- TSM2005 - 39000951
- TSM2110 - 39000955
- TSP2000+SP48D/1 - 39000903
- TSP2002+S40D - 39000922
- TSP2004 - 39000818
- TSP2005 - 39000808
- TSP2006 - 39000823
- TSP2101 - 39000963
- TSP2210 - 39001083
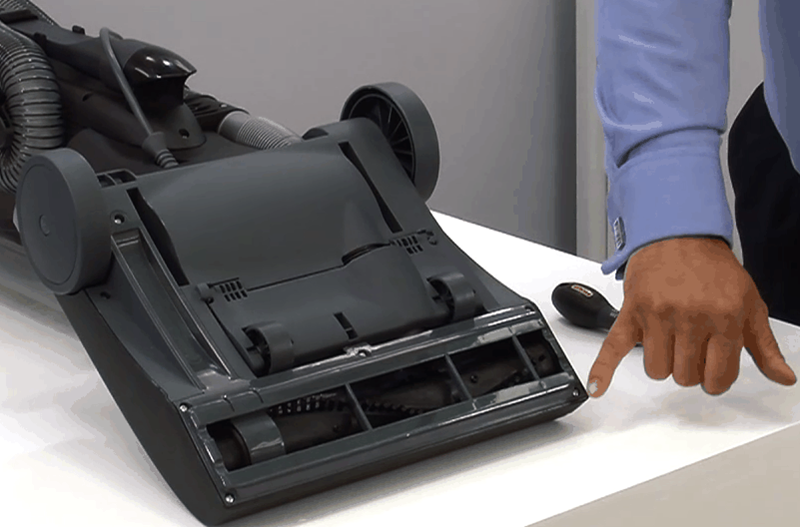
Check the belt is not worn or broken
The brushes at the base of your cleaner spin round to brush fluff and debris found on the surface of the floor up into the cleaner. If the rubber drive belt breaks the brush will not be able to turn and you will notice it’s not picking stuff up in particular hair and fluff. Switch the cleaner on, tilt it over and look to see if they turn. Before you do any work on your cleaner please UNPLUG it from the electrical supply.
The brushes at the base of your cleaner spin round to brush fluff and debris found on the surface of the floor up into the cleaner. If the rubber drive belt breaks the brush will not be able to turn and you will notice it’s not picking stuff up in particular hair and fluff. Switch the cleaner on, tilt it over and look to see if they turn. Before you do any work on your cleaner please UNPLUG it from the electrical supply.
picture showing the brushes are not moving round
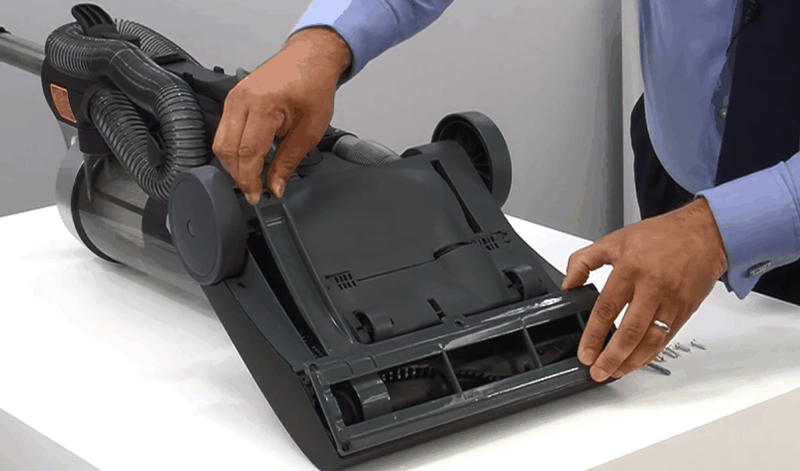
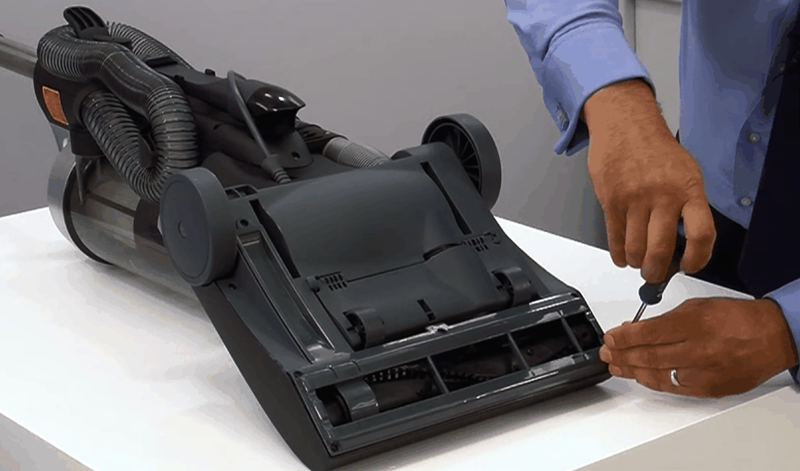
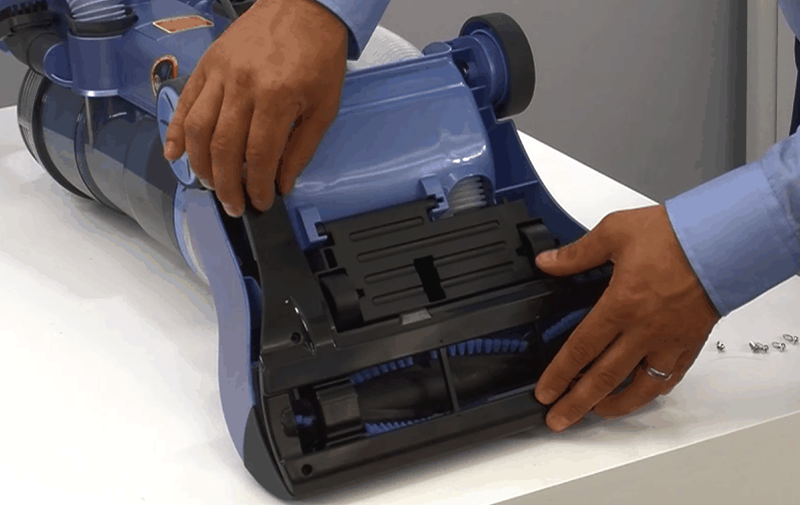
In order to get to the belt and brushes, turn the cleaner over and remove the brush cover plate. This is held on with 5 screws. A standard Phillips head screw driver will be needed to undo the screws. Now lift off the cover plate and the brush and drive belt can be seen.

once all 5 screws are out lift the cover off as shown
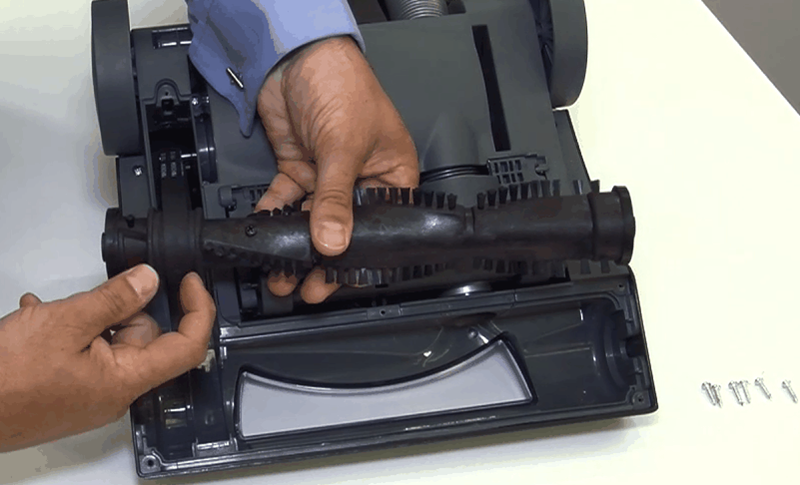
Remove the belt and brushes. The belt may not be broken but simply stretched and not able to spin the brushes effectively. We recommend that you replace the belt and brushes once per year to keep the cleaner working effectively and give the best pick up possible. You can purchase replacements from the spares pages on our website.
Loop the belt over the motor spindle, don't worry if it looks brown or a rusty appearance that is normal.
Now loop the other end of the belt over the brush roll and pull to stretch the belt and fit it into the body of the cleaner. Once its fitted turn the brush by hand a few times to make sure that the new belt is not trapped.
Finally fit the cover and secure with the 5 screws. Switch on and try the cleaner.
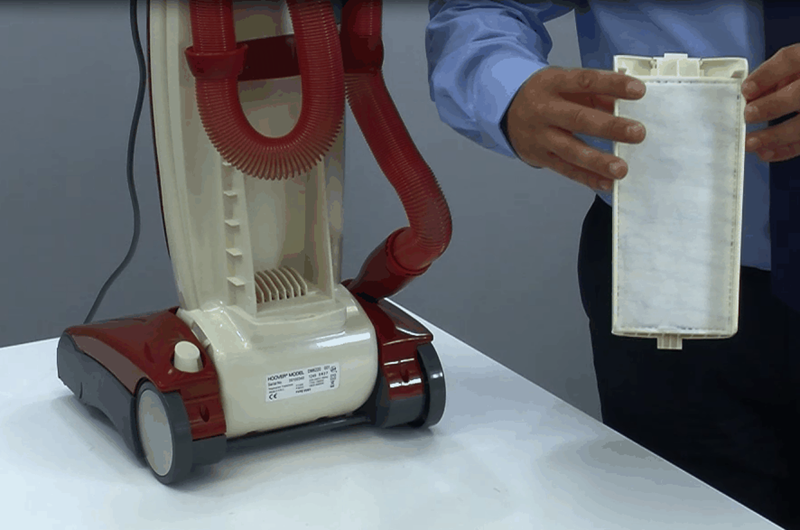
Clean the filters
It is important in order to get the very best suction power and prevent the cleaner from overheating and cutting out to regularly clean the filtration system. There are 2 filters fitted to your machine, the pre motor filter is found under the bag. Open the bag door and lift the bag out, in the bottom is an oval filter. Dust it off and rinse under a warm tap.
It is important in order to get the very best suction power and prevent the cleaner from overheating and cutting out to regularly clean the filtration system. There are 2 filters fitted to your machine, the pre motor filter is found under the bag. Open the bag door and lift the bag out, in the bottom is an oval filter. Dust it off and rinse under a warm tap.
Blue pre motor filter
At the rear of the cleaner is an exhaust filter. Turn the cleaner round. To clean this just pull the clip down at the top of the cover, and wash the cover and filter in warm water. Before you pop the 2 filters back make sure they are thoroughly dry, this can take up to 24 hours. Filters will require regular replacement. Should you require replacement filters you can purchase them via the spares section of this website.
Unclip the filter and remove for cleaning
This solution applies to the following models:
Vacuum Cleaners
- PU1240 - 39100276
- PU2012 - 39100339
- PU2110 - 39100202
- PU2111 - 39100245
- PU2115/1 - 39100345
- PU2118 - 39100344
- PU2120 - 39100201
- PU2121 - 39100246
- PU2122 - 39100330
- PU2130 - 39100200
- PU2300 - 39100366
- PU71EN01 - 39100390
- PU71PU01 - 39100409
- U3495 - 39100113
- U3524 - 39100178
- U3525 - 39100114
- U3530 - 39100012
Clean the pre motor filter
Remove the dust box and empty the contents into your bin.
Remove the dust box and empty the contents into your bin.
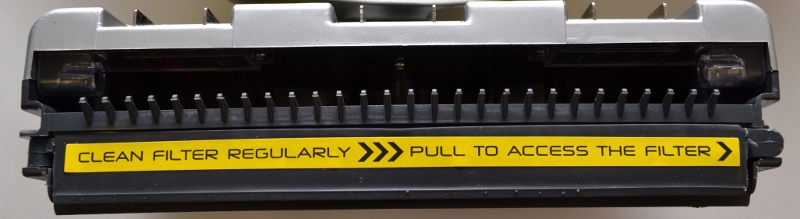
Pull the filter from the right hand side - it will swivel out.
Unclip the filter to remove it from the dust box. It can be brushed or washed in warm water. Please ensure it has dried thoroughly before re fitting it to the cleaner.
This solution applies to the following models:
Vacuum Cleaners
- RBC090001 - 39001242
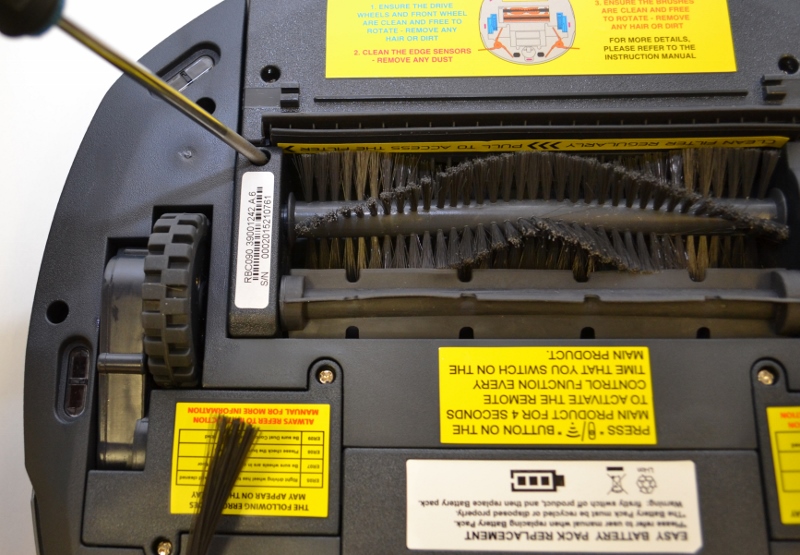
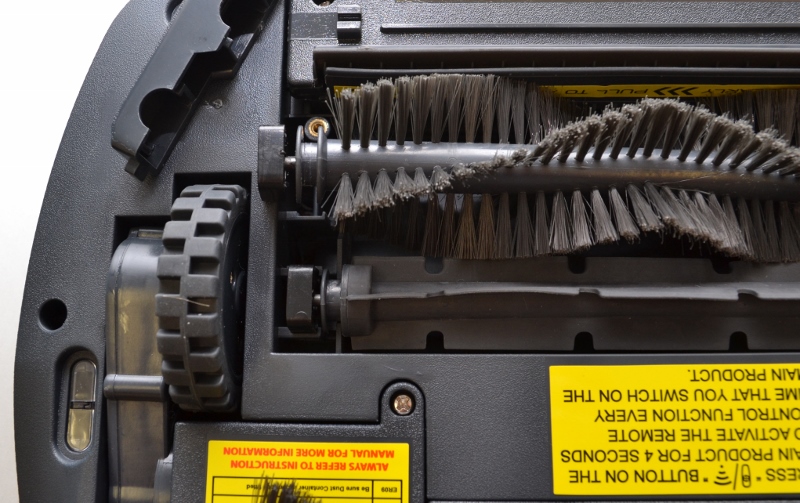
Remove the 2 brush bars and clean them
There are 2 brush bars underneath the robot that brush dirt up from the floor. Turn the product over and use a standard Phillips screw driver to undo the screw holding the brush retainer in.
There are 2 brush bars underneath the robot that brush dirt up from the floor. Turn the product over and use a standard Phillips screw driver to undo the screw holding the brush retainer in.
unscrew the brush retainer on the left hand side of the base
Remove the bar retainer and lift out the brushes.
remove any debris tangled around the brushes
This solution applies to the following models:
Vacuum Cleaners
- RCB009 - 39000911
Clean the floor brushes
There are 4 brushes in total that will require cleaning from time to time.
There are 4 brushes in total that will require cleaning from time to time.
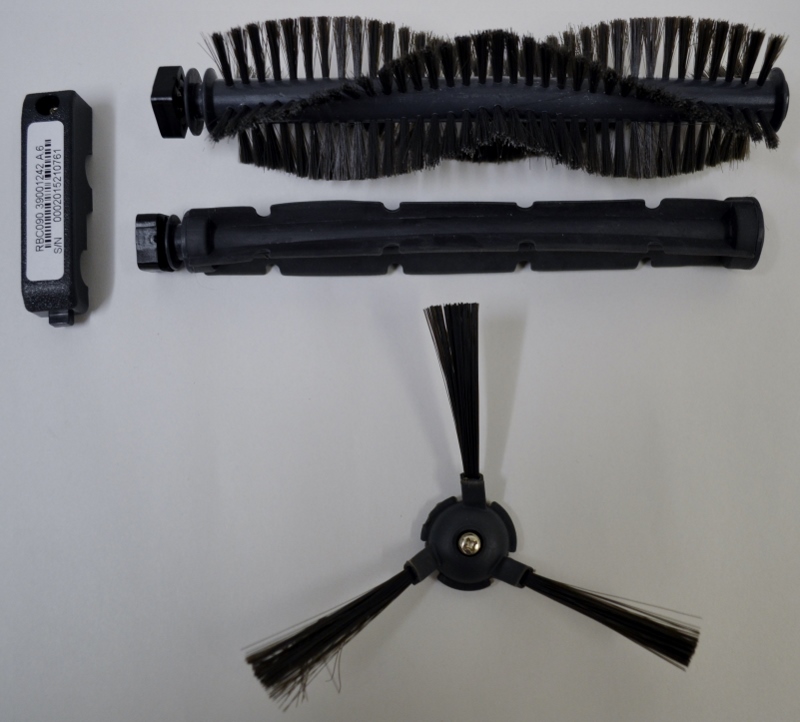
The two sets of edge brushes can be unscrewed and cleaned. A standard Philips screwdriver is required to loosten the securing screw in the centre of the brush. Remove any debris tangled around them and then immerse in warm water to restore the shape needed to sweep effectively.
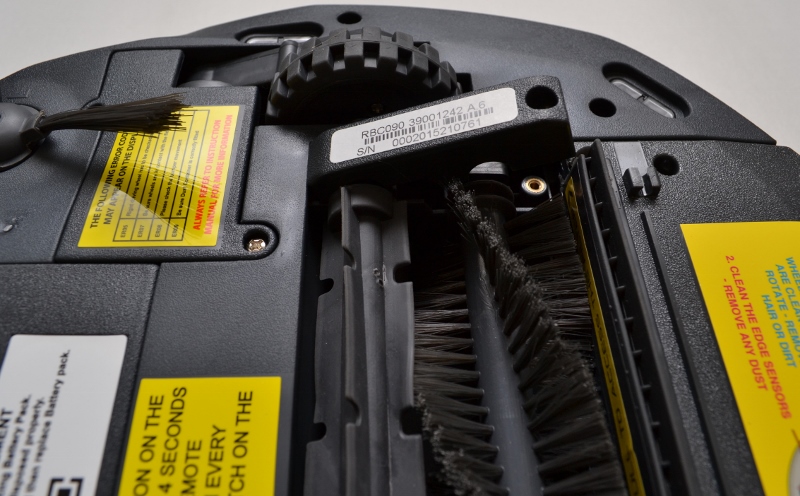
The main bar style brushes are secured in with a locking bar, use a standard Phillips screwdriver to undo the screw holding the bar in and remove it.
lift the brushes out for cleaning
Remove any debris tangled around the brushes an fit them back into Robo.com. The retaining bar should be placed in at an angle as shown when re fitting.
This solution applies to the following models:
Vacuum Cleaners
- RBC090001 - 39001242
The belt may be worn or broken
Before you start, please make sure your cleaner is unplugged. To get to the belt we will need to remove the hood, this is quite easy, start by lowering down the handle. Look either side of the handle near to the large rear wheels for the 2 securing screws. You will need a posi drive screwdriver to turn the screws anti clockwise in order to remove them. Now pull the hose out of the hood and pull the height adjuster knob out.Now lift the hood up and off.
Before you start, please make sure your cleaner is unplugged. To get to the belt we will need to remove the hood, this is quite easy, start by lowering down the handle. Look either side of the handle near to the large rear wheels for the 2 securing screws. You will need a posi drive screwdriver to turn the screws anti clockwise in order to remove them. Now pull the hose out of the hood and pull the height adjuster knob out.Now lift the hood up and off.
Lift the brushes up to get them out. Take off the old belt and fit the new one around the motor pulley. It may appear to be rusty or dark looking. This is not a fault with your product, but do make sure any debris is moved before you hook the belt over the spindle. Fit the brush roll into the loop of the belt and stretch back to fit the brush roll into its housing. Finally give the brush a few turns by hand to ensure it’s not jammed.Belts will require regular replacement. Should you require replacement belts you can purchase them via the spares section of this website.
This solution applies to the following models:
Vacuum Cleaners
- DM4468 - 39100131
- DM4476 - 39100140
- DM4484 - 39100134
- DM4485 - 39100132
- DM4494 - 39100133
- DM4496 - 39100102
- DM4499 - 39100130
- DM4523 - 39100080
- DM4525 - 39100119
- DM5226 - 39100313
- DM5226/1 - 39100350
- DM5524 - 39100127
- DM5530/1 - 39100124
- DM6163 - 39100159
- DM6173 - 39100160
- DM6185T - 39100161
- DM6197T/1 - 39100181
- DM6200 - 39100197
- DM6207T - 39100158
- DM6211 - 39100213
- DM6212 - 39100219
- DM6213 - 39100222
- DM6214 - 39100227
- DM6215 - 39100183
- DM6216 - 39100229
- DM6220 - 39100340
- DM6222 - 39100218
- DM6223 - 39100221
- DM6225 - 39100262
- DM6226 - 39100260
- DM6227 - 39100176
- DM6300 - 39100378
- DM71DM02 - 39100388
- DML5224 - 39100268
- DML5227 - 39100261
- PU1240 - 39100276
- PU2012 - 39100339
- PU2110 - 39100202
- PU2111 - 39100245
- PU2115/1 - 39100345
- PU2118 - 39100344
- PU2120 - 39100201
- PU2121 - 39100246
- PU2122 - 39100330
- PU2130 - 39100200
- PU2300 - 39100366
- U3495 - 39100113
- U3524 - 39100178
- U3525 - 39100114
- U3530 - 39100012
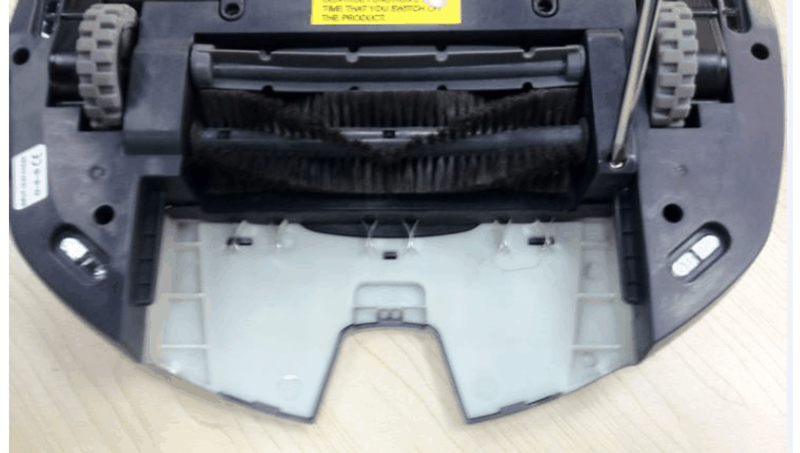
Check the brushes are turning
Underneath the cleaner there is a rotating brush bar that sweeps up dirt into the cleaner. If there are fluffy bits and hair left on the carpet it may be a good idea to check the condition of the belt that makes these brushes spin round. The belt may have broken in which case the brushes won't spin. Switch the machine on and tilt it back to have a look.
Underneath the cleaner there is a rotating brush bar that sweeps up dirt into the cleaner. If there are fluffy bits and hair left on the carpet it may be a good idea to check the condition of the belt that makes these brushes spin round. The belt may have broken in which case the brushes won't spin. Switch the machine on and tilt it back to have a look.
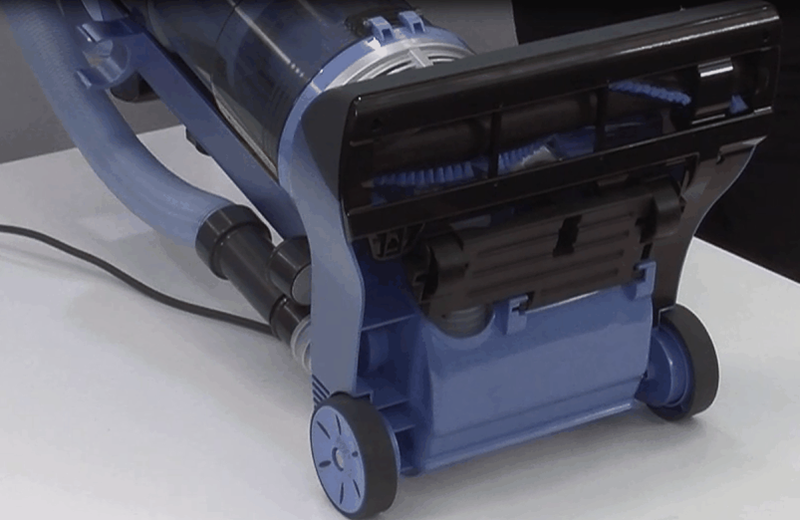
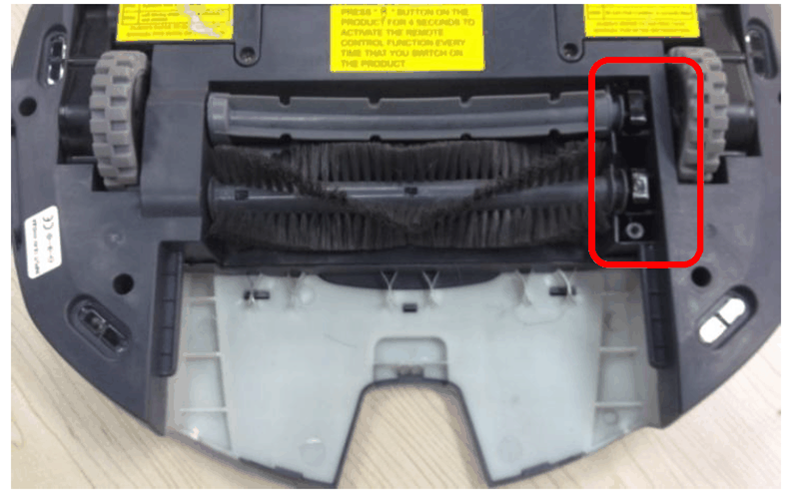
the cleaner is switched on but the brush bar is not spinning
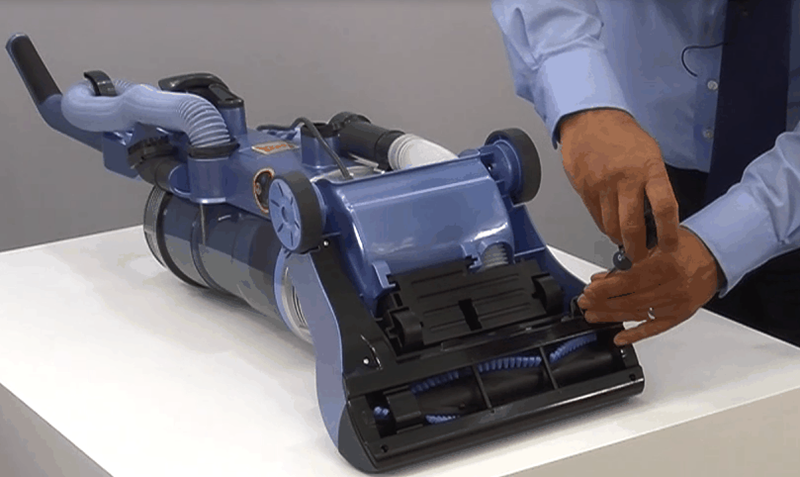
If the brushes do not turn, then a new belt is needed. Belts will stretch and wear with use... it is a consumable item and not covered by our warranty. New belts can be purchased from our spares site. Before you fit a new belt please unplug the globe cleaner from the mains before starting the job. The belt is found under the top cover so we need to start by taking the cover off. Using a standard Phillips screw driver undo the 11 screws from underneath the cleaner.

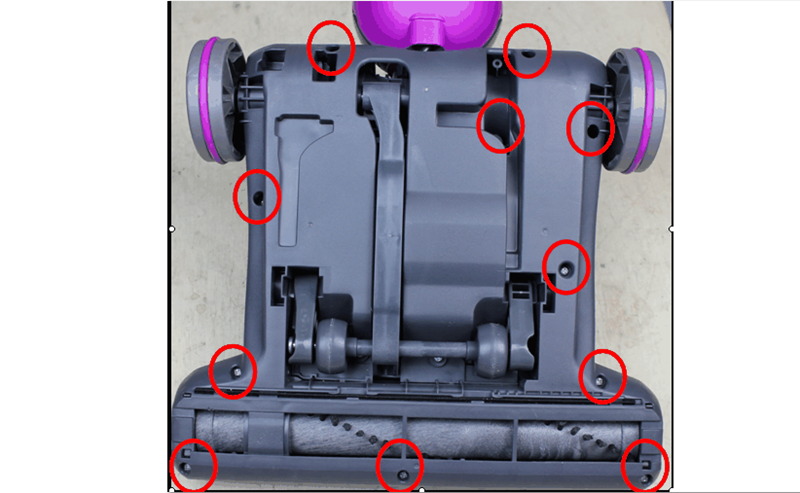
undoing one of the 11 screws - circled in red for guidance in finding them
Once all 11 screws are taken out turn the cleaner over and lift off the height setting knob and the hose. Now prize the lid away from the body of the cleaner.
Lift out the brush by pulling from each side and take it out. Remove the old belt and fit the new belt over the brush and then push the brush roll down into the base. Stretch the belt over the motor spindle as shown here:
Turn the brush roll by hand a few times to make sure that it is free and the new belt is not trapped anywhere.
Fit the cover, hood and hose, turn it over and re fit the 11 screws.
re fit the screws
This solution applies to the following models:
Vacuum Cleaners
- GL1103 - 39100292
- GL1106 - 39100293
- GL1108 - 39100360
- GL1109 - 39100294
- GL1110 - 39100349
- GL71GL01 - 39100384
- GL71GL02 - 39100385
- GL71GL02001 - 39100445
- GL71GL04001 - 39100426
- GLE900 - 39100379
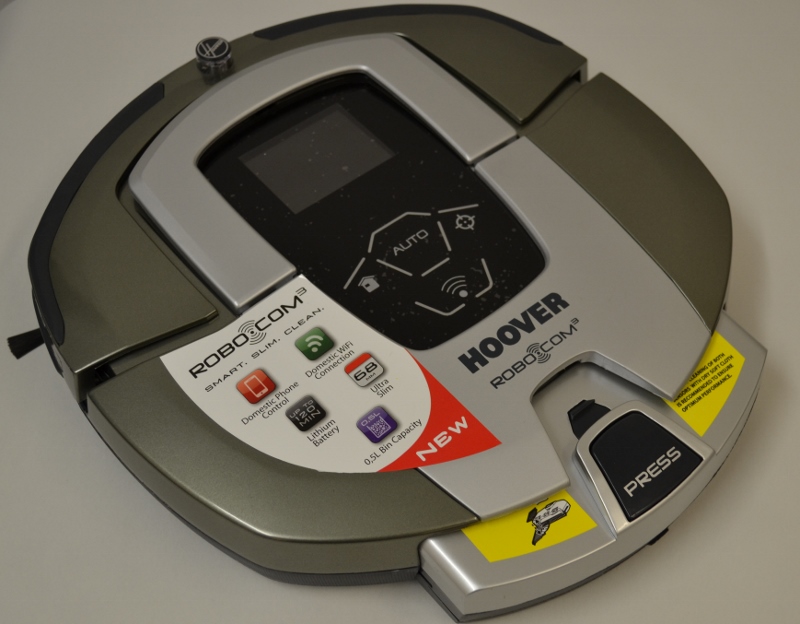
Make sure the senors are clean
Robo.com3 uses sensors to find its way around your home and not bump into things, these can get dirty and the cleaner will not clean correctly. The sensors are fitted on the bottom of the product, on the bumpers and also on the dust box as shown by the arrows:
Robo.com3 uses sensors to find its way around your home and not bump into things, these can get dirty and the cleaner will not clean correctly. The sensors are fitted on the bottom of the product, on the bumpers and also on the dust box as shown by the arrows:
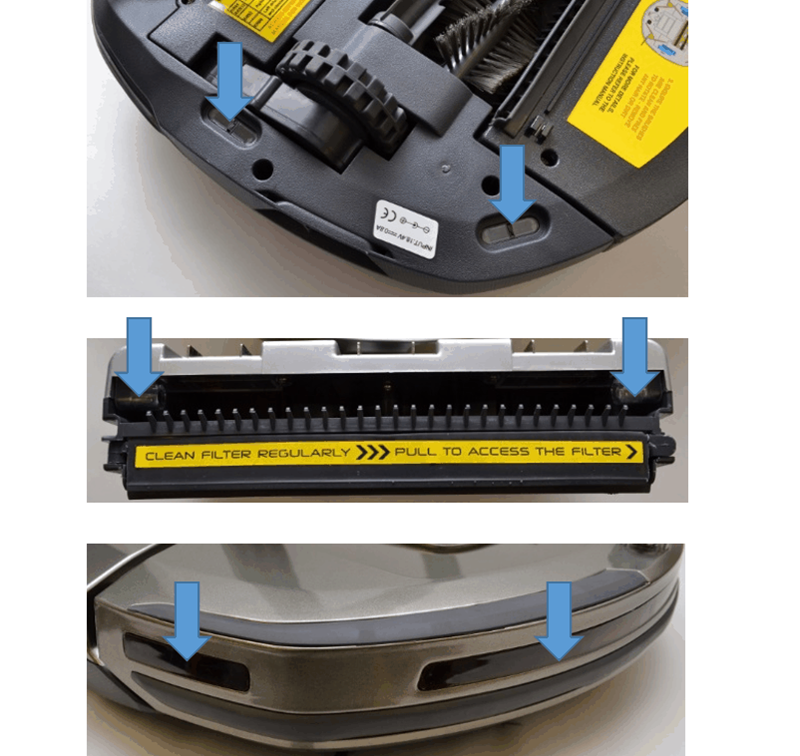
wipe the sensors clean with a dry cloth
This solution applies to the following models:
Vacuum Cleaners
- RBC090001 - 39001242
Check that the drive wheels are clean
Your Robo.com 3 has drive wheels underneath that allow it to move around your home and its possible that hair, threads and debris may get tangled around them making it difficult to move around. Turn the robo.com over and clean away any thing trapped around the wheels, shown here by the arrow.
Your Robo.com 3 has drive wheels underneath that allow it to move around your home and its possible that hair, threads and debris may get tangled around them making it difficult to move around. Turn the robo.com over and clean away any thing trapped around the wheels, shown here by the arrow.

This solution applies to the following models:
Vacuum Cleaners
- RBC090001 - 39001242